Patrick Heine's NIS 23 "Ariel"
Ariel-1 (as with most of the others) was taken before the
mast tubes were installed. Notice the scuppers on the toerail. I'm
glad that I did this as water would otherwise be trapped here due to the
pronounced shear. Ariel-2 is a good shot of the foredeck. Because
of lack of space, the anchor hangs on brackets in the rode locker.
Ariel-3 shows the main hatch/amidships area. All lines run back to the
cockpit. The single Harken #6 winch provides ample purchase for the main
halyard, boom outhaul and jiffy reefing line. A Ronstan camcleat inboard
of the three Spinlocks secures the main vang. The hardware may seem by
many to be overkill and also an unneccessary expense, but as I have arthritis
in my hands (among other things!) as well as sail single-handed from time to
time so I felt that the extra cost was justified. I added a slight crown
to the main and fore hatch mostly for aesthetic reasons and also for increased
strength. The longitudinal "joint" grooves on the marine
okoume ply were made by setting the blade on my table saw at about 1/8"
depth, and then cutting them at regular intervals to simulate planking.
The grooves were then filled with an epoxy/graphite powder/cabosil mixture to
give the appearance of caulking. The effect is excellent! BTW, a
word of caution with regards to your choice of plywood for the cabin roof.
Try to find a type with the highest number of veneers as possible. I
used 3 ply and had some serious dishing occur as I curved it over the
bulkheads. I used a large quantity of 3M bubbles to get everything fair.
Ariel-4 shows the forward end of the cockpit. Hand lockers, main
traveller, Harken #6 winch for the centreboard, compass and upper and lower
mounts (not drilled out yet) for the mizzen mast tube are all evident.
Over the winter I plan on adding a turning block on the mizzen mast to allow
me to use the CB winch to help "sweat down" the mizzen halyard.
Ariel-5 shows the aft end of the cockpit. Notice the aperture for the
rudder stock/tiller. The small door underneath hides the controls for
the electric motor. Not yet installed is a Harken traveller
on the aft coaming for the mizzensheet. I must add some camcleats and
lines to the car in order to pull the mizzen boom closer to the centreline
when I'm closehauled - another winter project! The camcleat/swivel base
behind the main traveller is for the mainsheet. The scuppers can also be
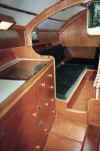
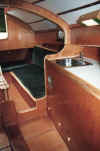
seen. Ariel-6 and 7 show the interior looking forward. The
portapotti works well with sufficient (barely) headroom for my six-foot frame.
I wouldn't want to read a book though if there's any sort of a decent breeze
blowing! One tends to get bruises on the ears from all the bouncing
around! The homebuilt fluorescent lamps can be seen over the sink and
alcohol stove. The portlights do open and are also homebuilt. The
electrical distribution and fuse panel can be seen below the sink. A
lift-out lid flush with the counter provides access to the icebox just forward
of the sink. Ariel-8, 9 and 10 are views of the cabin looking aft
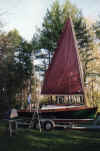
showing the settee/berths and centreboard trunk. Ariel-11 is launch day,
complete with a small bouquet on her bow. Ariel-12 is a shot of me
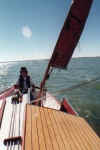
working on the rigging, still in the back yard. Ariel-13 is yours truly
on Lake St. Clair a couple of months ago.


